Hello, SAM
AWS Serverless Application Model
In the previous section you used the AWS Management Console to upload a simple AWS Lambda function that you created by hand. While this is useful to learn how Lambda works, introducing a repeatable process will help you create production-ready services.
The AWS Serverless Application Model (SAM) is an open-source framework for building serverless applications. It provides shorthand syntax to express functions, APIs, databases, and event source mapping.
SAM also offers the AWS SAM CLI, which provides a Lambda-like execution environment that lets you locally build, test, and debug applications defined by SAM templates. If you have not yet installed the SAM CLI, please see the instructions on the pre-requisites page then return to this page.
Creating a SAM app
To create your first SAM app, copy the following text and paste it into a terminal window:
sam init --runtime go1.xFollow the on-screen prompts. You are not asked to choose a runtime, as you have already selected the go1.x runtime via the --runtime flag.
- Choose 1 to use an AWS Quick Start Template
- Give your project a name or accept the default,
sam-app. The SAM CLI will create a new directory with the name you provide.
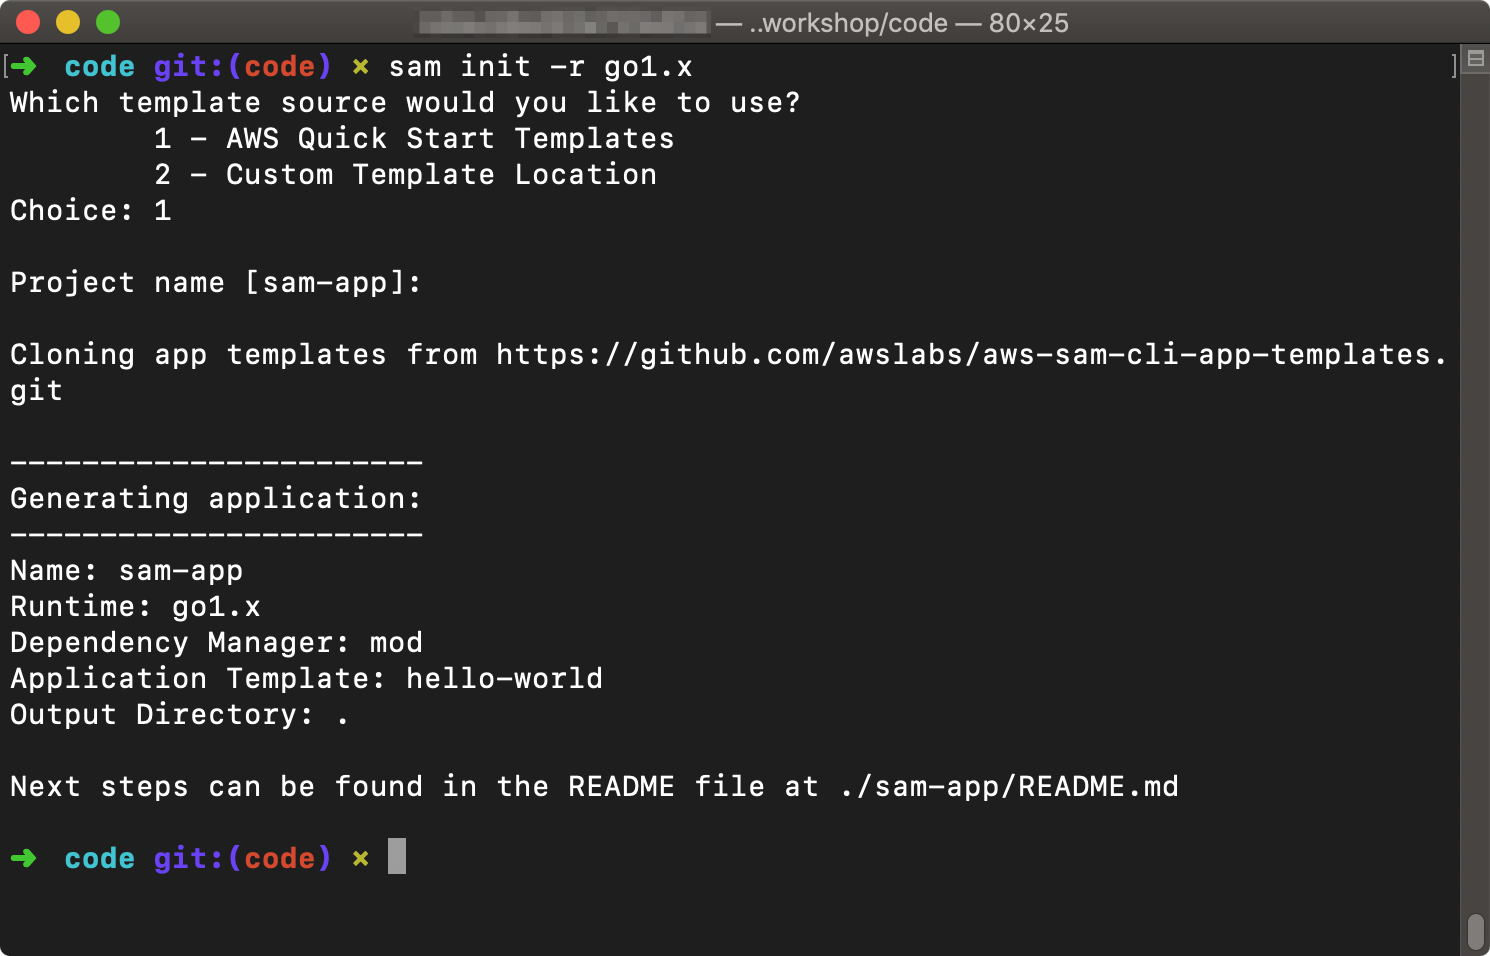
sam init
Take a look at the directory structure of the app that SAM generates.
.
├── Makefile
├── README.md
├── hello-world
│   ├── main.go
│   └── main_test.go
└── template.yamlMakefile- a more robust version of the Makefile you generated in the previous sectionREADME.md- a simple README file with instructions for running and deploying your apphello-world- a folder containing the source and tests for your appmain.go- a simple generated Lambda function for your appmain_test.go- a simple test framework for your app
template.yaml- a SAM template for your app
template.yaml
SAM CLI also generates a template.yaml file for you. Notice a few things about this file:
Transform: AWS::Serverless-2016-10-31- The
template.yamlfile is an AWS CloudFormation template with a Serverless Transform macro on line 2. This enables several SAM-specific resources and properties, including simplified Amazon API Gateway APIs and Amazon DynamoDB tables.
Globals:
  Function:
Timeout: 5- The Globals section defines values that will apply to all Lambda functions in your SAM app, unless you explicitly override them when defining your function. For example, line 11 defines the timeout for all of your Lambda functions to be five seconds.
Resources:
  HelloWorldFunction:
    Type: AWS::Serverless::Function
    Properties:
      CodeUri: hello-world/
      Handler: hello-world
      Runtime: go1.x
      Tracing: Active
      Events:
        CatchAll:
          Type: Api
          Properties:
            Path: /hello
            Method: GET
      Environment:
        Variables:
          PARAM1: VALUE
Comments have been removed from the above code for clarity.
- Here you see the heart of your SAM app, a single Lambda function. Notice on line 15 that it is of Type AWS::Serverless::Function, not AWS::Lambda::Function as you would see in plain CloudFormation. This is one of the custom resources provided by the Serverless macro.
- Line 17 defines the CodeUri, or the local folder where our function code resides.
- Line 18 defines the Handler, or the function that is called to begin execution. Note that for the
go1.xruntime, this is the name of your compiled executable. - Line 20 enables AWS X-Ray tracing to help you analyze and debug your function.
- Lines 22-26 define the Event that will invoke your Lambda function, in this case an HTTP GET request to an API Gateway resource at
/hello. SAM handles creation and connection of the API Gateway for you and provides the API URL as an Output.
hello-world/main.go
The Lambda function code that SAM generates in hello-world/main.go is similar to the code that you created in the previous step.
func handler(request events.APIGatewayProxyRequest) (events.APIGatewayProxyResponse, error) {- Note on line 24 that this Lambda function receives an input of type
events.APIGatewayProxyRequestand returns(events.APIGatewayProxyResponse, error).
Modify your function
The sample code that SAM provides when it creates your app makes a network call to determine your IP address. In order to simplify the learning experience, re-write your Lambda function to simply respond with the body of the original request. Do not change the function signature.
If you get stuck, one solution is provided below.
Since you're reading data from the body of the HTTP request, you'll also need to change the method from GET to POST in template.yaml.
Test your function locally
Now that you've written a simplified function, it's time to test it locally.
Create an Event
A typical use case for invoking your Lambda function is to pass it an event. The events.APIGatewayProxyRequest event contains more fields than the simple event you created in the previous step. The SAM CLI provides the command sam local generate-event to generate a sample payload from 20 different event sources.
Copy and paste the following text into a terminal window:
mkdir events
sam local generate-event apigateway aws-proxy > events/api-gateway-proxy-request.json
Edit the generated event events/api-gateway-proxy-request.json and change the value of the “body” field to the following:
"body": "GoDays Berlin",Now you have a complete, representative events.APIGatewayProxyRequest that can be passed to your Lambda function on each local invocation.
Build and Invoke
Build your Lambda function as you did previously:
make buildMake sure that you are calling make build, not sam build. SAM does not yet support the build command for the go1.x runtime.
Now invoke your function locally with the event you just created.
Ensure that Docker is installed and started on your machine before running this step. If you have not yet installed Docker, please see the instructions on the pre-requisites page then return to this page.
sam local invoke HelloWorldFunction \
  -e events/api-gateway-proxy-request.json
As expected, “GoDays Berlin” is returned in the body of the response object.
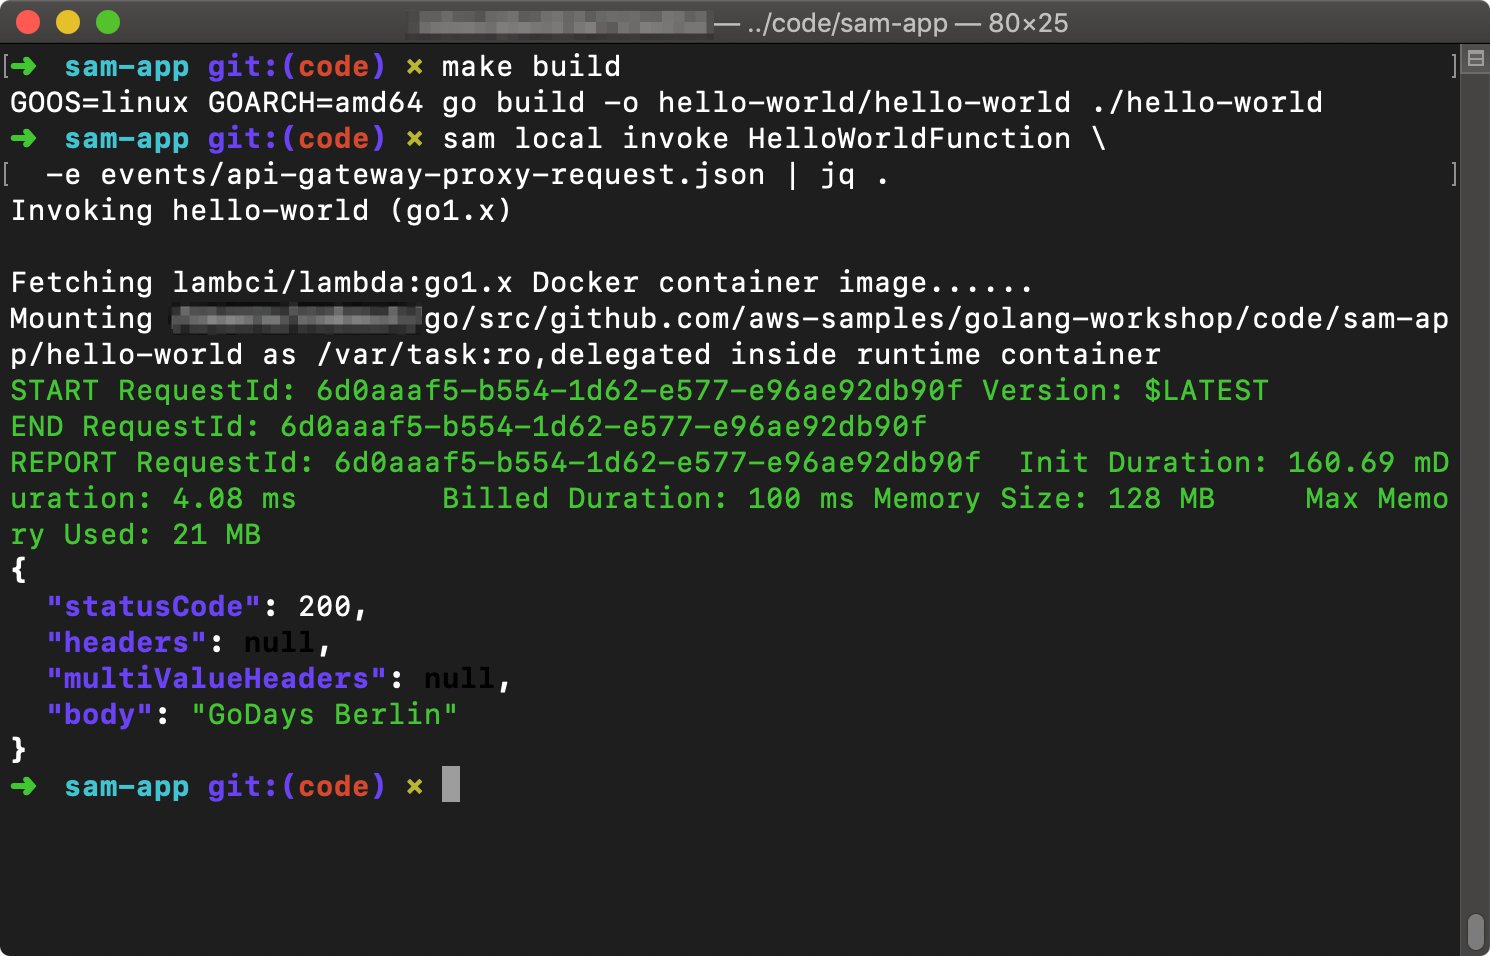
sam local invoke
The above screenshot uses jq to format the response object for readability. You may install jq if you find it useful, but it is not required to complete this workshop.